How to photograph children by Mark Condon - Romanian Mum Blog
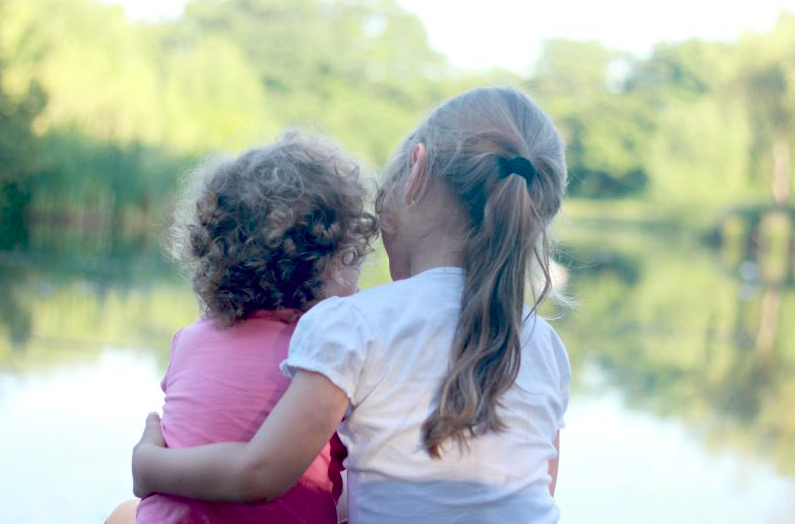
As you know I love snapping pictures with my lovely girls but I am not a professional photographer so when I was contacted by Mark Condon I was thrilled. Mark Condon is a destination wedding photographer at Gold Hat Photography currently based in Sydney, Australia. He is also the founder of camera gear and photography website Shotkit, and author of 5 books including More Brides, Lightroom Power User and LIT. Today he is sharing with us his top tips for photographing children. Hi there, Romanian Mum readers! My name’s Mark and I write for a photography and camera gear website called Shotkit. I know that many of you Romanian Mum fans are mums, or at least, have friends who have children, so I’ve put together a post on my top 5 tips on taking photos of children. These 5 tips are part of a much longer post on how to photograph children which you can read if you want to delve deeper into the topic. If you’ve got any good tips for photographing children of your own, be sure to share them with me, Otilia and all the other readers in the comments below. So without further ado, let’s see how we can get better photos of the little ones! Tip #1 – Focus on the eyes If your camera has the ability to control the focus point manually (i.e. not the camera deciding where to focus by itself), stick that focus point right on the child’s eye. If they’re not facing you, focus on the nearest eye. The eyes always need to be in pin-sharp focus, and ideally they’ll show mostly the iris/pupil, as opposed to mostly the white area. Eyes in a photo attract the viewer’s eye, and make the image instantly more alluring. If you really want to make your child’s eyes stand out, try and get a ‘catch light’ in them. This can be achieved by ensuring there’s some light falling on your child’s face, and can really help the eyes come alive. If you don’t have a dedicated camera, you can still move the focus point on your smart phone to be right on top of your subject’s eye. Using a smart phone is absolutely fine to take the odd snap, but you have much more creative control if you use a proper camera. This brings me on nicely to tip number 2. Tip #2 – Get the right camera If all you have near you is your mobile phone, that’s fine, just use it. Unless you plan to sell your work, no one will care about the quality of the image – all that matters is that you capture that moment. However, if you want to take better photos of your children, you really should invest in a good camera. No matter what the Apple marketing may tell you, your phone still can’t take as good a photo as a dedicated camera! I’ve lost count of the number of parents who’ve asked me what is the best camera for taking photos of children. I’ve also lost count of the number of parents who’ve invested in a clunky dSLR, never to take it out of the bag. Follow my advice if you want to buy the right camera for taking photos of your kids. In my opinion, you need a camera that is lightweight, small and has fast Autofocus. If it’s also got ace recognition and a tilting LCD screen, happy days! As most parents’ first camera purchase is usually dictated by budget, start with this guide I wrote on the best cameras under $500. I always recommend investing a minimum of $500 on a camera, but I understand this is always possible, which is why I also wrote the best cameras under $200. If you’re a bit more clued up about cameras, you’ll want to have a look at the best mirrorless cameras and the best compact cameras posts too. These will give you a good, all-round view on what type of camera is best for you. And if you don’t have any time to do any reading but just want what is in my opinion the best camera for any parent, just buy this one with this lens. It’s a bit of an investment, but it’s perfect for fast moving kids and so much more. I wrote a full review on the Olympus OM-D EM 5 Mark II here, including lots of snaps of my own children and our holiday together. Hopefully it gives you a good idea of what’s capable with this fantastic camera. Tip #3 – Alter your Perspective Photographing kids from above can give an interesting perspective. If you have a tilting LCD screen on your camera, you’ll find this much easier – look at the tip above for a camera with this feature. My favourite shots are often those taken directly above the child, especially if they are laying down. This angle of view never fails to create an interesting photo, especially if you have time to compose the shot. You may even decide to include some of yourself in the photo, or just part of another person. Try it next time your child is asleep. Take extra care to get the shot completely perpendicular to where they are laying. If you’re lucky, your partner will be asleep there too, giving the photo an extra sense of scale. Another perspective is to take your photos from down low. Try and take the majority of photos of your child at their eye level. This may mean bending down, or even laying on the floor. If you’re photographing more than one child, try and make yourself the same height as the tallest child (unless they’re tall, in which case get them to bend down to match the height of the smaller child). You can get creative with your compositions to exaggerate the size of your child by getting lower than their eye level and shooting upwards. Tip #4 – Make the face the brightest thing This doesn’t apply to every situation, but for the most part, you should try and make sure your child’s face is the brightest thing in your photo. This can be as simple as moving yourself until your angle puts a dark wall behind the child, rather than the bright sky. If you can’t do this, try and expose for your child’s face. Look up how to use the ‘Exposure Compensation’ dial and ‘AE Lock’ button on your camera. Then make the adjustment to make the child’s face nice and bright, or at least brighter than that of its background. If you’re using an iPhone, tap on your subject’s face, then lock the exposure of your image by holding your finger down until ‘af/ae lock’ appears on the screen. Now re-compose your shot, fine tune the exposure if necessary by sliding your finger upwards or downwards, and finally take the shot. Tip #5 – Use Layers This is another favourite tip of mine that can vastly improve all genres of your photography, and it’s also relevant when photographing children. Layers in this case are foreground and background elements that help create a three dimensional story. You can experiment with shooting through foreground elements, like getting down really low and including the grass in front of a child, whilst keeping the focus on the child. Another example and a layering technique I use a lot is to include part of another subject’s body as the foreground element, such as their legs if the main subject is a small child. This helps to not only give perspective to the size of the child, but also helps to tell the story, and can even help to ‘frame’ your subject too by directing the viewer’s eye. You’ll usually want to use as high an aperture as possible on your lens (f/1.4, 1.8, 2, 2.8 etc), or as long a lens as possible (or try zooming right in) to help blur the foreground and background elements and keep the viewer’s focus on the subject. You can layer a photograph using a smart phone, but the difference between the in-focus and out-of-focus areas won’t be as apparent, so the effect won’t be as pleasing to the eye. If you really want to take advantage of this tip, I’d recommend you consider investing in a dedicated camera (see tip #2!) Final Word I hope you enjoyed these 5 tips on how to get better photos of your children. The most important thing of all is just to get the shot. Fleeting moments of your loved ones are truly priceless, so just make sure you capture them with whatever means you can. Good luck and happy snapping! Mark ************************* Thank you so much for this Mark! For more insight into the world of Mark and his photography pop over his own site – http://shotkit.com. It is full of great information and I certainly learned a lot from it! Disclosure: No payment was received for this post. All photos belong to the owner of this site(besides the one with Mark) and I added them to reflect Mark’s advise. Like this Article? Subscribe to Our Feed!
Otilia